Supporting Tools to get at home when diagnosed with Dysphagia

When you or a loved one is first diagnosed with dysphagia, the kitchen can feel like a daunting place. Beyond the recipes, having the right gear is essential for safety, consistency, and maintaining love for food.
IDDSI-guided tools can be difficult to find when you are dealing with a big change in your life. In this article, we cover what you need and the right tools to take the guesswork out of meal prep. In this guide, we’ll break down the must-have equipment to help you navigate Levels 0–4 with confidence.
What You Need to Know About Modifying Food Texture for Dysphagia
Before getting into the tools used to change food texture, it’s important to understand why texture matters in the first place. If the texture is too thin, too hard, or uneven, it can increase the risk of aspiration, which may result in people with dysphagia choking or having the food go into the airflow and lungs. Here is some helpful information you need to get familiar with:
IDDSI Level: The Standardized Food Thickness Levels
IDDSI Level is created by The International Dysphagia Diet Standardisation Initiative (IDDSI), a non-profit worldwide organization to educate people with or taking care of someone with dysphagia.
Read More: Understanding 7 IDDSI Levels, Your Complete Guide to Safe Eating with Dysphagia
The framework gives caregivers and clinicians a shared language for describing food and liquid textures. Food levels range from Level 3 (Liquidised) through to Level 7 (Regular), while liquids are classified from Level 0 (Thin) to Level 4 (Extremely Thick). It is created with deep and long years of research to make sure people with dysphagia can eat and drink as safely as possible.
Someone who struggles with thin liquids, for example, may need drinks thickened to Level 2 (Mildly Thick, nectar consistency) or Level 3 (Moderately Thick, honey consistency).
A person with more significant swallowing difficulty might need foods at Level 4 (Pureed) - smooth, with no lumps, chunks, or bits of skin.
Texture Modification Tools
Once you know the IDDSI level you're working with, having the right tools makes a significant difference in both the safety of what you're preparing and the time it takes. Here are some texture modification tools you can keep at home when you're adjusting to a lifestyle with dysphagia.

Thickening Agents
These are probably the first things most people turn to. Powders and gels Nestle ThickenUp or Thick-It the target IDDSI level. You can thicken water, juice, coffee, tea, pretty much anything.
There are starch-based and xanthan gum-based options, and they behave a little differently. Xanthan gum tends to stay more stable over time and doesn't thicken further as it sits.
Read more: What Is a Gum-based Thickener? A Dysphagia Thickener Alternative You Might Love
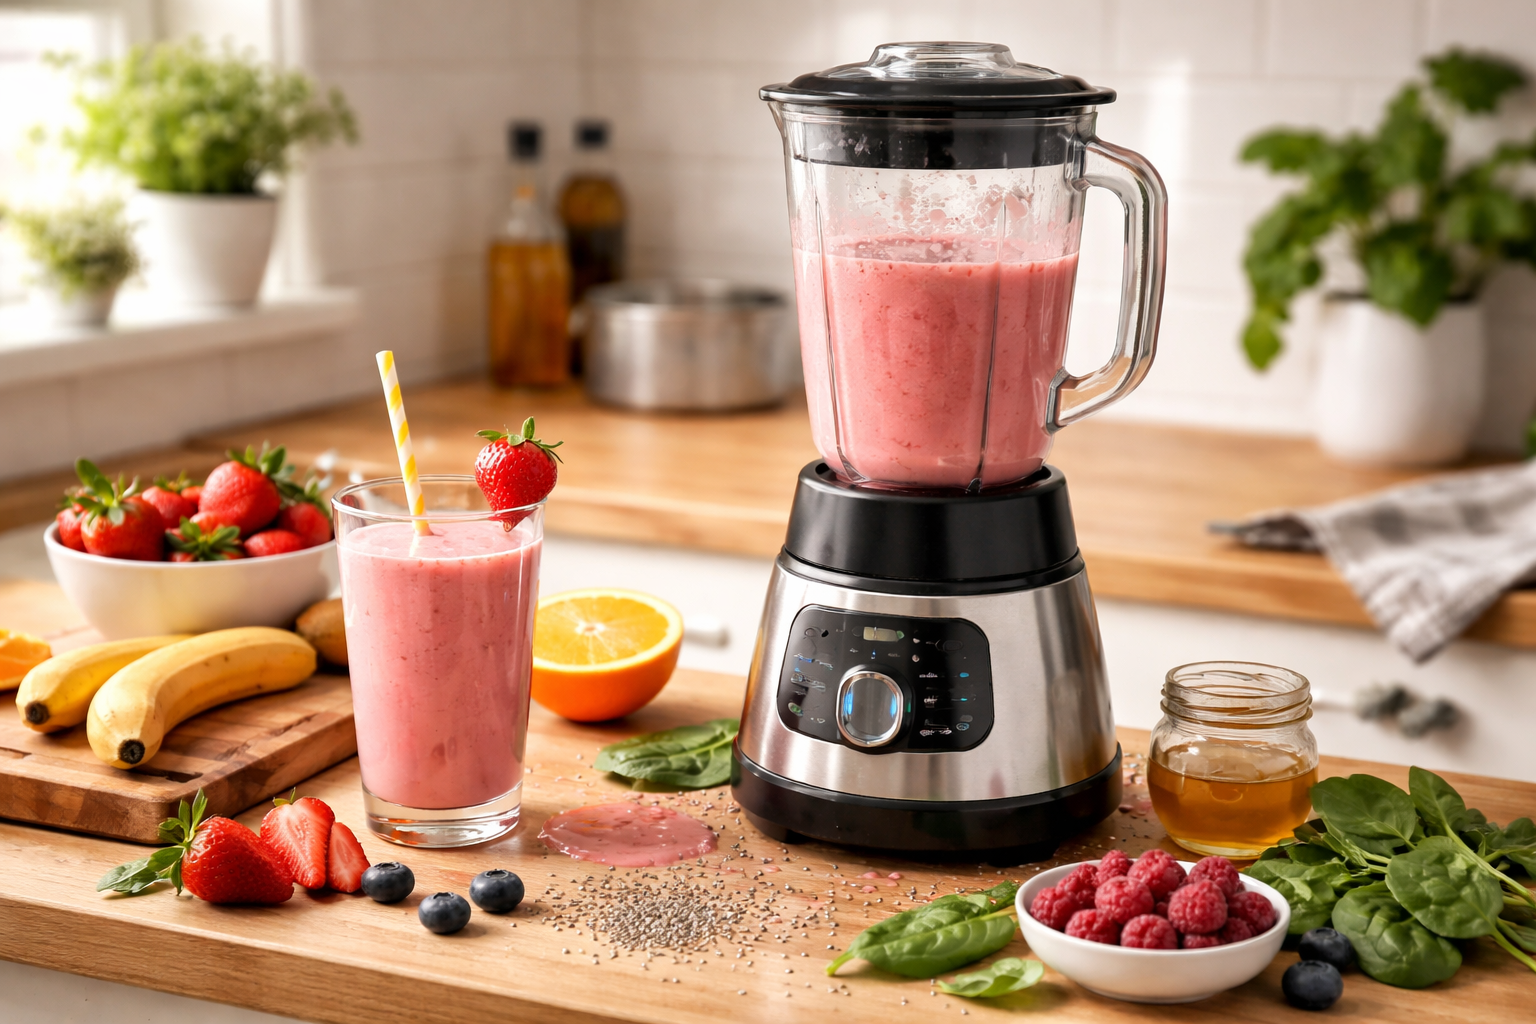
High-powered Blender or Food Processor
A regular blender can get you partway there, but it often leaves behind small lumps, bits of skin, or fibrous strands that aren't visible until someone has difficulty swallowing them.
A high-powered blender like a Vitamix gives you genuinely smooth purees, the kind that pass the IDDSI spoon tilt test without any sneaky chunks. If you're preparing dysphagia meals regularly, this is probably the most important tool to have. It also gives you real control when you're working across different texture levels, depending on what you're making.
Digital Food Thermometer
Food texture isn't always static; instead, it can change because of temperature changes, too. A drink you thicken to the right consistency can keep thickening as it cools, which means by the time it's finished, it might be too thick. Some hot foods thin out slightly when warm and then thicken again as they sit. It's worth checking consistency right before serving, not just when you're preparing it.
Temperature also affects swallowing itself. Cold foods and drinks can help stimulate the swallow reflex in some people, making it slightly easier to trigger. Others do better with warm. It depends on the person, so pay attention to what seems to work and keep it consistent.
A digital food thermometer is one of those tools that seems minor until it isn't. It lets you confirm food is at a safe serving temperature and helps you catch when something has cooled enough that its texture might have changed.

Dysphagia Cooking Recipes Books
If you're just starting with texture modification, having a cookbook written specifically for dysphagia is genuinely helpful.
The recipes are already built around specific IDDSI levels, so you're not adapting regular recipes and hoping for the best. It also gives you a better feel for techniques like how to keep flavors strong, how to adjust consistency, what works and what doesn't.
Read More: 5 Dysphagia Cookbooks With Recipes

Pre-made Dysphagia Friendly Meals
Sometimes you get too busy to do meal prep for dysphagia, and that's totally okay. Premade dysphagia meals are designed to meet specific texture standards, which means the consistency work is already done. They're useful as a backup option, and they're also a helpful reference for what a well-prepared pureed meal should actually look and feel like when you're getting started.
Read More: 4 Best Pureed Foods For Dysphagia You Can Buy Online
Specialized Drinkware
Standard cups often force you to tilt your head back, which opens the airway and increases choking risk.
- Nosey Cups: These have a cutout for the nose, allowing you to drink without tilting your head back.
- Weighted Cups: If your dysphagia is accompanied by tremors (like in Parkinson’s), these provide stability.
- Controlled-Flow Cups: These limit the amount of liquid released at once to prevent "bolus" (the mouthful) from being too large to manage.
- Specialized Straws: One-way valve straws keep liquid at the top of the straw, reducing the effort and air intake needed to take a sip.
Read More: Best Dysphagia Cups for Safe Drinking based on IDDSI Levels
Adaptive Eating Utensils
- Maroon Spoons: These are shallow, sturdy plastic spoons. They are designed to deliver a small, manageable amount of food and are helpful for those with a poor "lip seal."
- Weighted or Angled Utensils: Helpful if coordination is an issue, ensuring the food actually makes it to your mouth without spilling.
Therapy Tools
- Oral Swabs/Hygiene Kit: Oral health is critical. If bacteria from the mouth are swallowed into the lungs along with food or saliva, it can lead to aspiration pneumonia.
- Breather exersizer: Breathing exercises are a cornerstone of dysphagia rehabilitation because the acts of swallowing and breathing are neurologically linked. In a healthy system, your body momentarily stops breathing (apnea) during a swallow to ensure the airway is protected.
- (Tongue) Strengthening Devices. The tongue is the "engine" of the swallow. If it’s weak, it can’t push food back effectively.
Visual & Tactical Aids
- The IDDSI Funnel/Syringe Test: This isn't for your mouth, but for your food. It’s a specific 10mL syringe used to test if a liquid is truly "nectar-thick" or "honey-thick" according to international safety standards. Read more: Flow Test Using Syringe Guide
- The "IDDSI" Chart: Keep a printed copy of the International Dysphagia Diet Standardisation Initiative framework on your fridge. It’s the gold standard for testing if your food is the correct level (e.g., Level 4 Pureed vs. Level 5 Minced & Moist). Read more: Complete IDDSI Framework Detailed definitions